
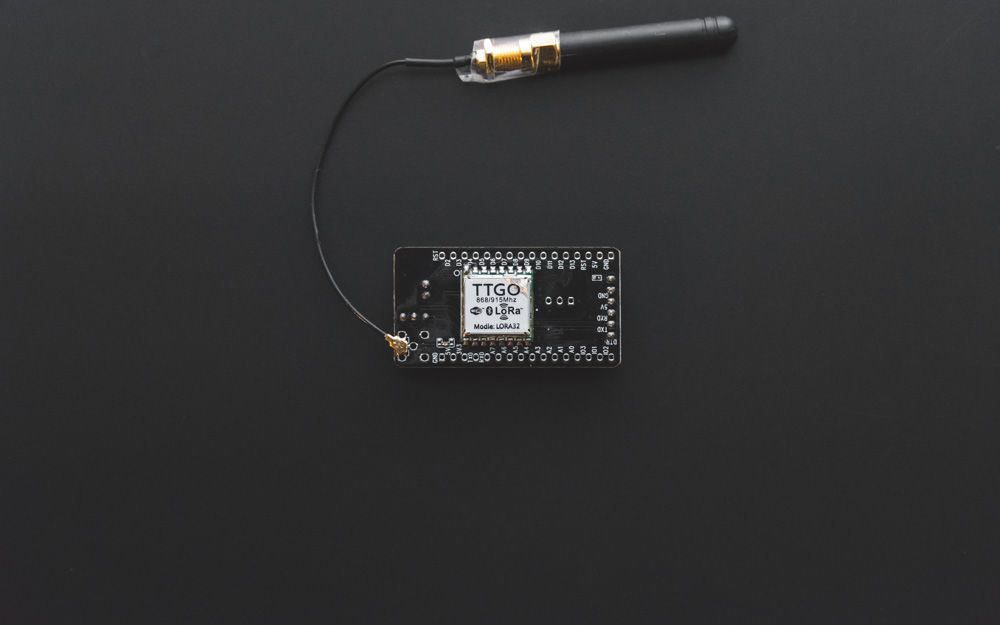
I've been playing around with a nice little module I bought from aliexpress. It's the TTGO T-Deer Pro mini LoRa Module, which is based on the SX1276 and an ATmega328 with an 16Mhz crystal. On the module it says: Pro mini_LORA 20180926. I've ordered the 868Mhz Module, but it's also availabe in the 433Mhz and 915Mhz version. I wanted to connect this module with the LMIC Arduino Library to a LoraWAN Network, in this case the Thethingsnetwork.org. At the begining I had some problems with this module, but let's start at the beginning...
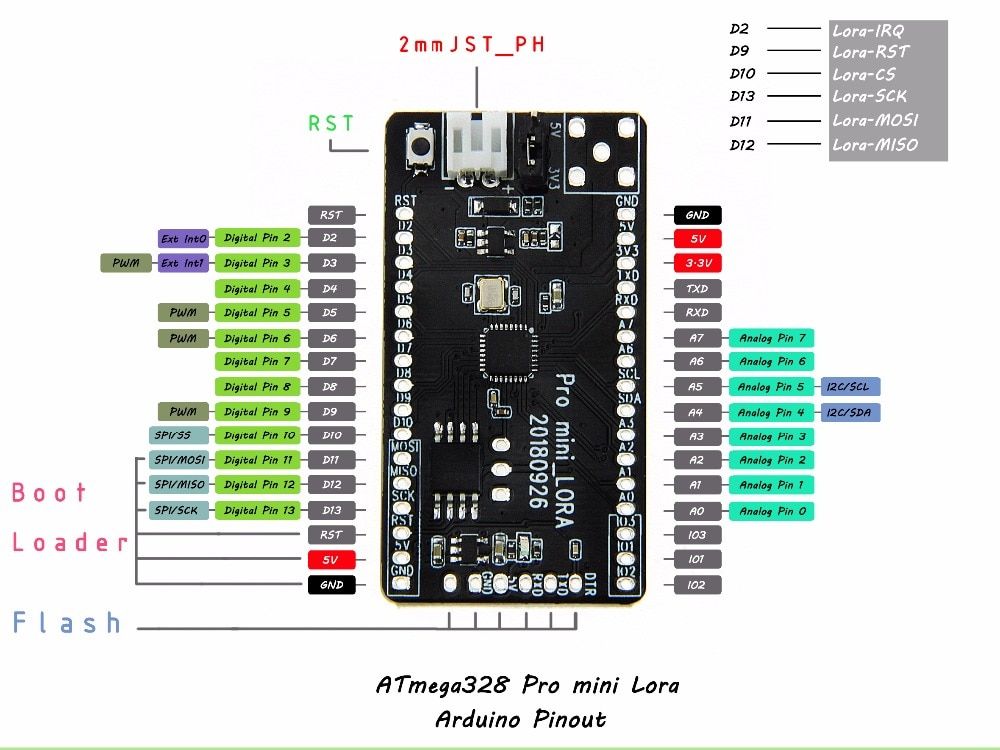
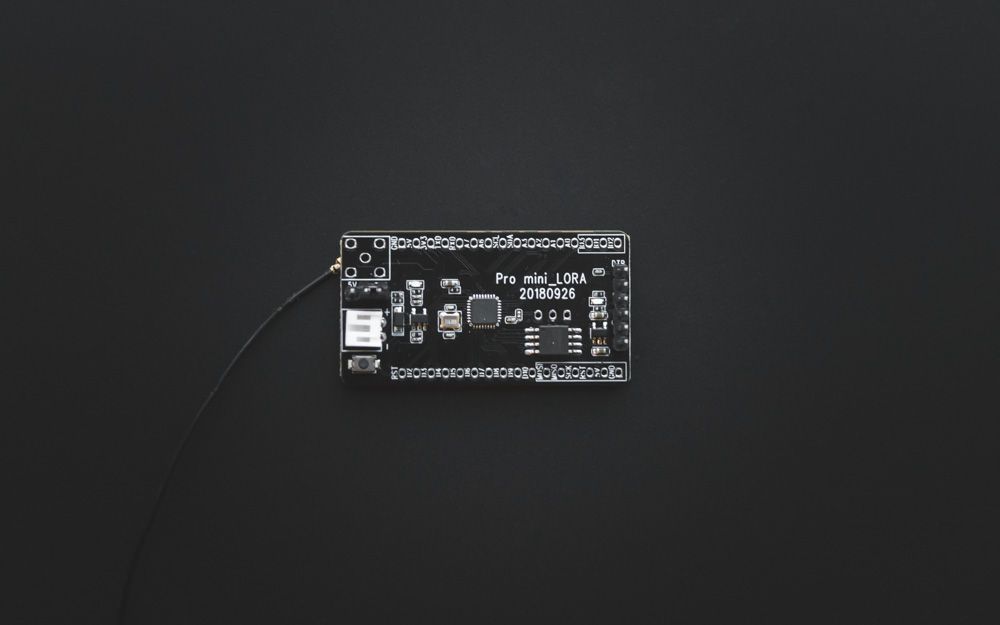
Finally after some weeks waiting, the module arrived. It comes with an antenna, antenna adapter and an male 2mm JST-Pin for your lithium-Ion battery. There is very little documentation on this module except this pinout:
Update (10.02.2019):
I was searching the web and found some useful information at the module. So you've got your 5/3.3V jumper which is only for the VCC of your Atmega. The SX1276 always gets 3.3V. There is an 5V power line and an 3.3V power line and the battery power line (VBAT).
When you power your module with an battery there is an LDO (Low Dropout Regulator) Datasheet: here. It's an ME6211 which looks like your typical China made LDO. The typical standby current is only 0.1μA.
Also there is this standard TP4054 charging chip on board, which is needed for charging your battery. You can check your battery voltage on pin PD6. First I thought wtf, why do they map the voltage divider output to an standard i/o-port. As it turns out the PD6 on the Atmega328 is an multipurpose pin. Digital and analog. (PCINT22/OC0A/AIN0) PD6
You can get the Datasheet for the Atmega328 here: click!
What you can do is, desolder the blue LED (who needs that LED anyway?). And connect your CHRG-Output of your TP4054 to one unused Digital-I/O port. This way you can monitor the charger. The charging resistor from your TP4054 is 2kOhms, this results in 0.5A charging current. So be sure not to charge a small lithium ion battery like a 100mAh-Battery.
SPI on board Flash Memory
There is an Winbond 32M-Bit SPI Flash on board. You can use the flash module for saving sensor data every minute or so and then send the messages via LoRa-Wan to the cloud or something like that. I've not tried it yet... but it looks cool. And of course there are some ready to go libraries out there.
FLASHING
To flash the module you need a USB-TO-UART converter like the CP2102 (Aliexpress link at the bottom) which you can get for about 1$ inclusive shipping at aliexpress. If you use platform.io be sure to put those settings in your platformio.ini.
[env:pro16MHzatmega328]
platform = atmelavr
board = pro16MHzatmega328
framework = arduino
upload_speed = 115200
monitor_speed = 115200
board_build.mcu = atmega328p

framework = arduino
Of course the upload and monitor speed settings are up to you. You can use the board with the 5V connector from your uart-converter. With 3.3V it won't work, even if you put the jumper in 3.3V mode.
For flashing I put the jumper at the 5V position and it works fine. When I connect an battery, for example an lithium ion battery. I put the jumper in the 3.3V position and had no problems so far.
Remember to connect the RXD to TXD and TXD to RXD.
OTAA -Over-the-Air Activation
The atmega communicates with the lora module over SPI. With SPI you can read and write to registers on the SX1276 and not just communicate on a higher level with serial data.
To connect to the Thethingsnetwork you not only need to send data to another LoraNode (you can do this for example with this library: https://github.com/sandeepmistry/arduino-LoRa ) you need to encrypt the data and transmit on a specific channel with your decice address etc. so that on the other side the application server can decrypt your message and display your data. Basically this is LoraWAN. (There is more to it)
Luckily someone already made a library for that, and also not for the higher level communication like the ones you can download at thethingsnetwork.org, but exactly for the SPI-Communication.
So back to my little LoRa-Adventure: To get the OTAA-Example of the library working, I had to change the example a little bit. And I only had one module, and no access point right in my vicinity. So my first test was disappointing. I got out of my appartment and went to a little hill. From there I could see the tower of the computer science department where they have an access point for the thethingsnetwork. And then ... nothing. With no debug output or something I just did not know what went wrong. So I went back and ordered some more modules at aliexpress. So future me can create his own little LoRa-WAN access point for the thethingsnetwork.org.
And then ... well items from China to Germany take around two to four weeks until they arrive. So one evening night I went out with a friend of mine, gear packed and we started a little coding session at the university. There it was the receiver almost in plain sight, so I knew packages will definitely arrive.
The thing which got it working was:
LMIC_setClockError(MAX_CLOCK_ERROR * 1 / 100);
so the MAX_CLOCK_ERROR represents 100% of the LMIC.clockError, and when we set the clock error to 1% it works.
And then it worked. My first message received was: 48 65 6C 6C 6F. H E L L O.
CODE
I edited the example from the lmic-arduino library a little bit. I'm only trying to send the data every minute or so. Also be sure to just go in your platform.io project into the library folder and then:
git clone https://github.com/matthijskooijman/arduino-lmic.git
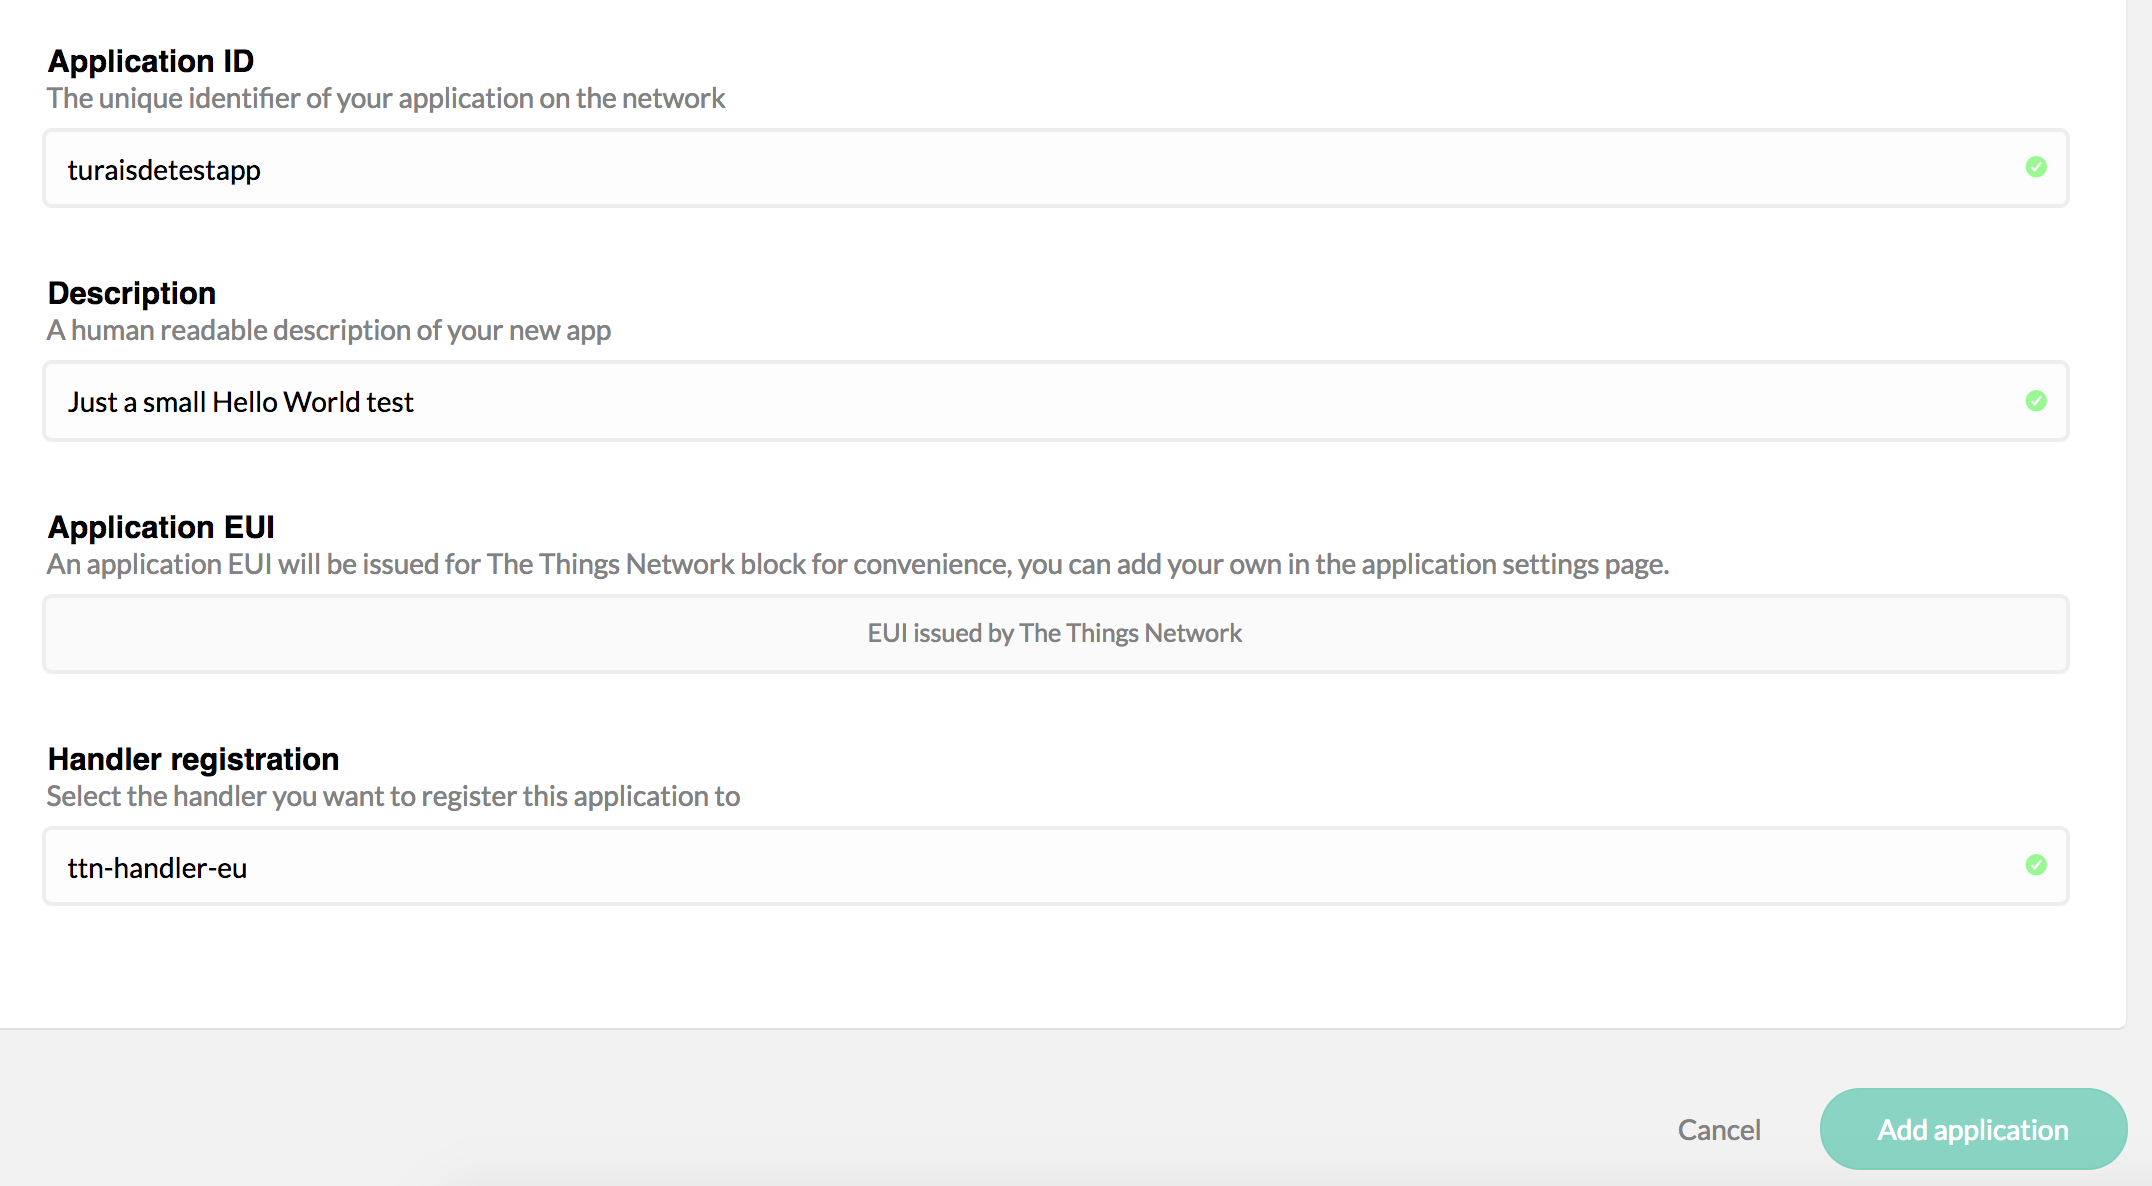
CONNECTING to TTN
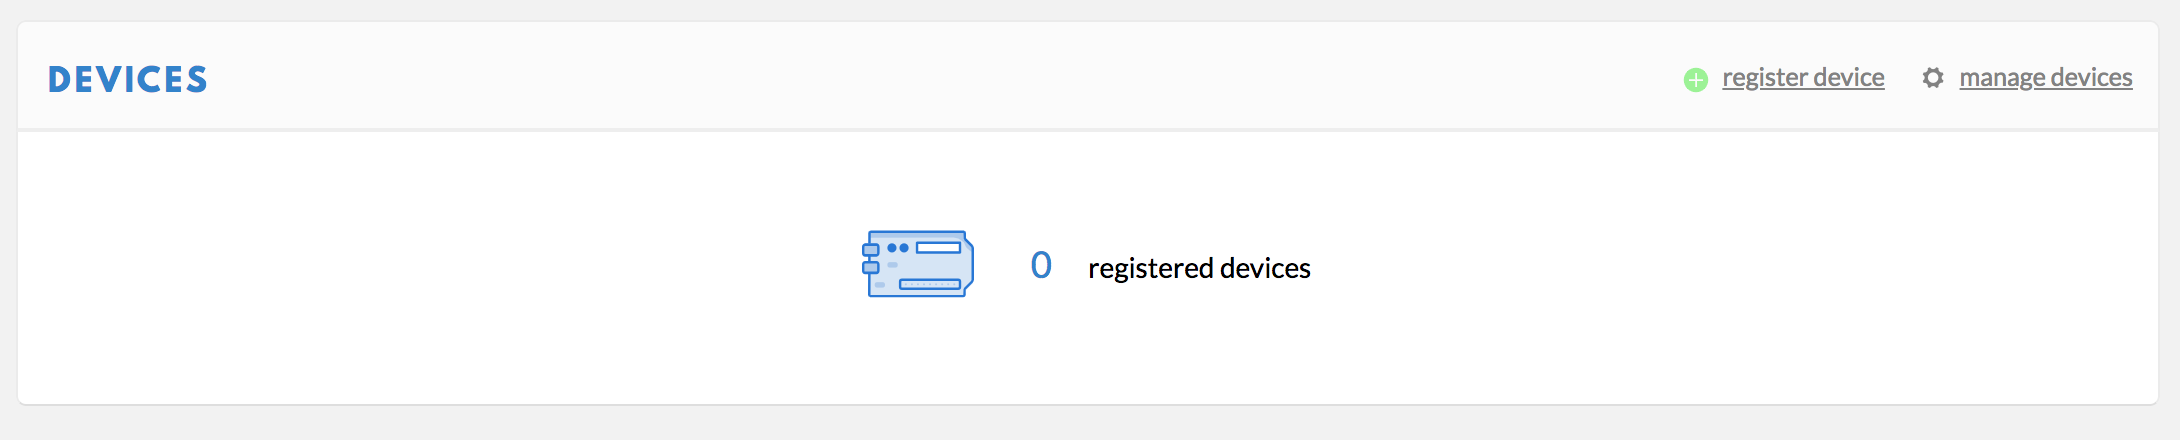
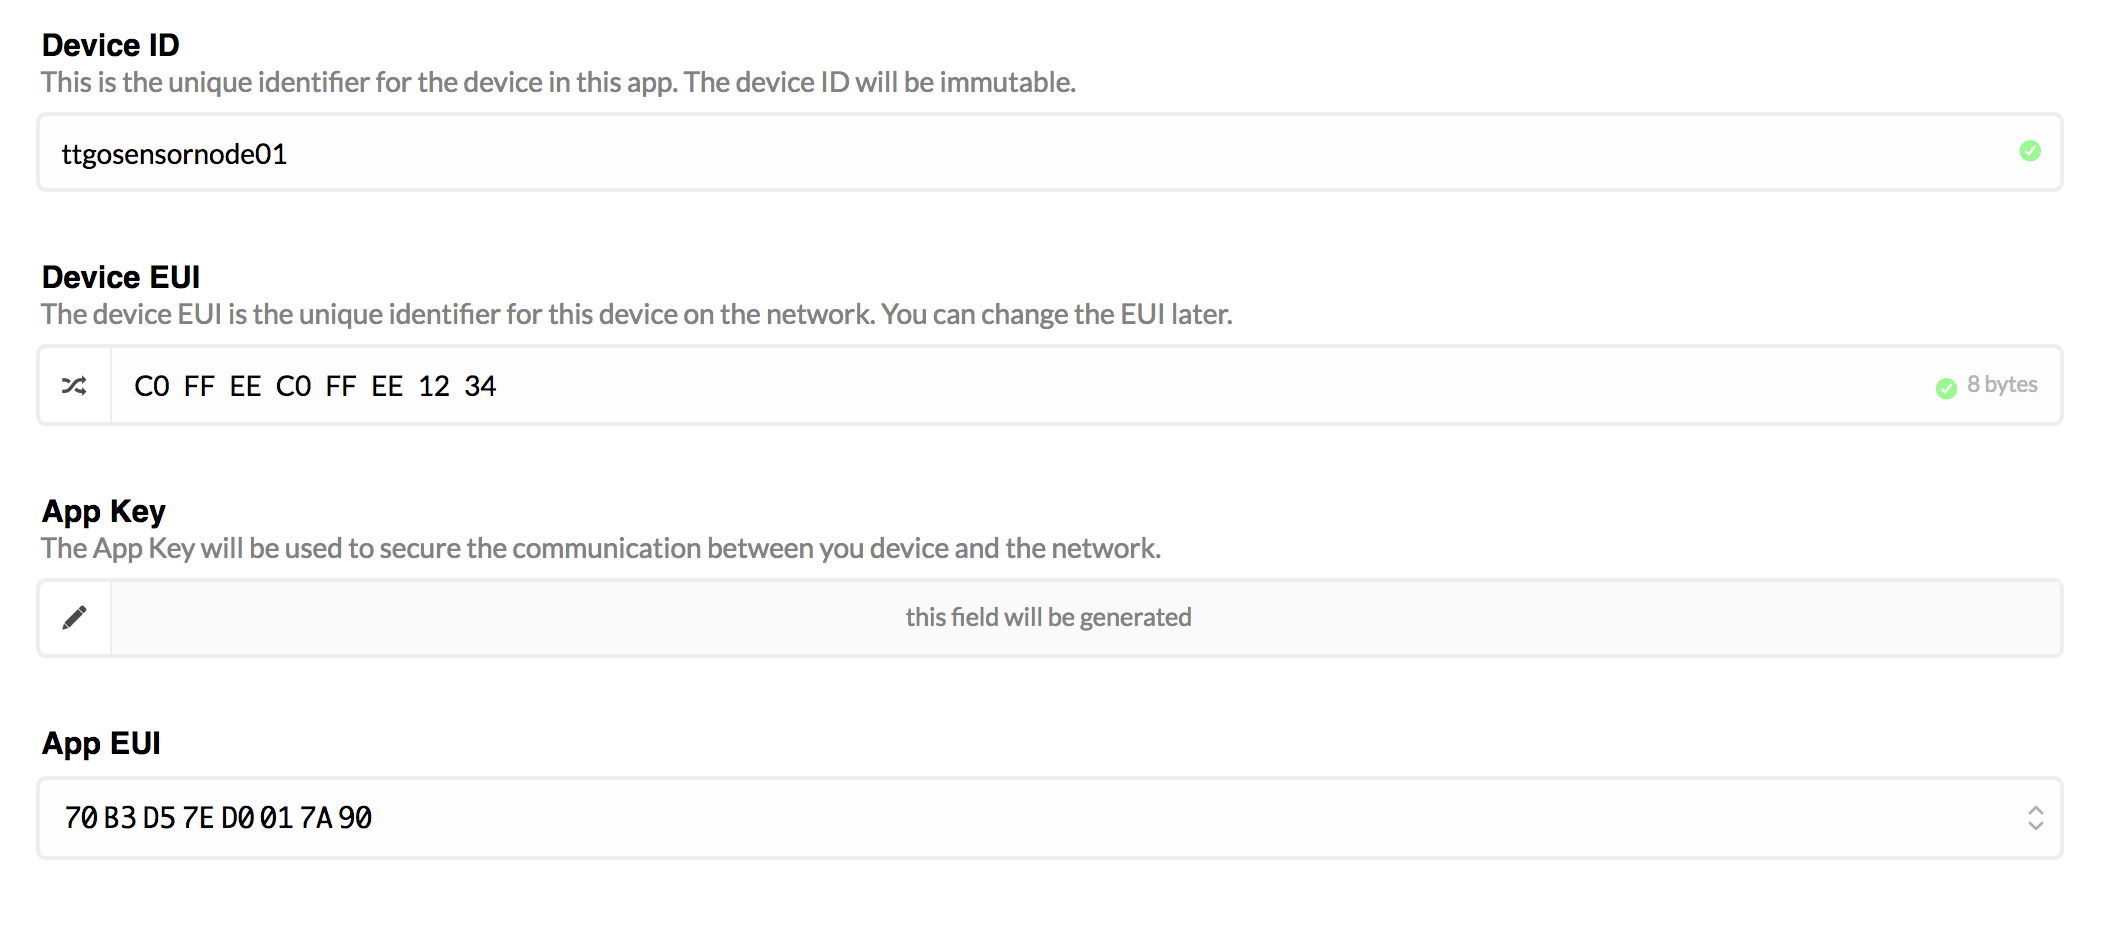
Before you just copy and paste the code, the thing you need is an thethingsnetwork.org account. Then go to: Consele - Applications, and on the right: add new application. Then just follow the steps.
Receiving Data
To receive data, you need to be in range of an TTN-Gateway. Goto your project and then in the data-tab, the data will pop up. And you're done. Of course you could now setup an integration service, which will save your data in a database, or will push it to your server.
Pin Mapping
// Pin mapping
const lmic_pinmap lmic_pins = {
  .nss = 10,
  .rxtx = LMIC_UNUSED_PIN,
  .rst = 9,
  .dio = {2, LMIC_UNUSED_PIN, LMIC_UNUSED_PIN}, //dio0, dio1, dio2
};
COPY-AND-PASTE-CODE:
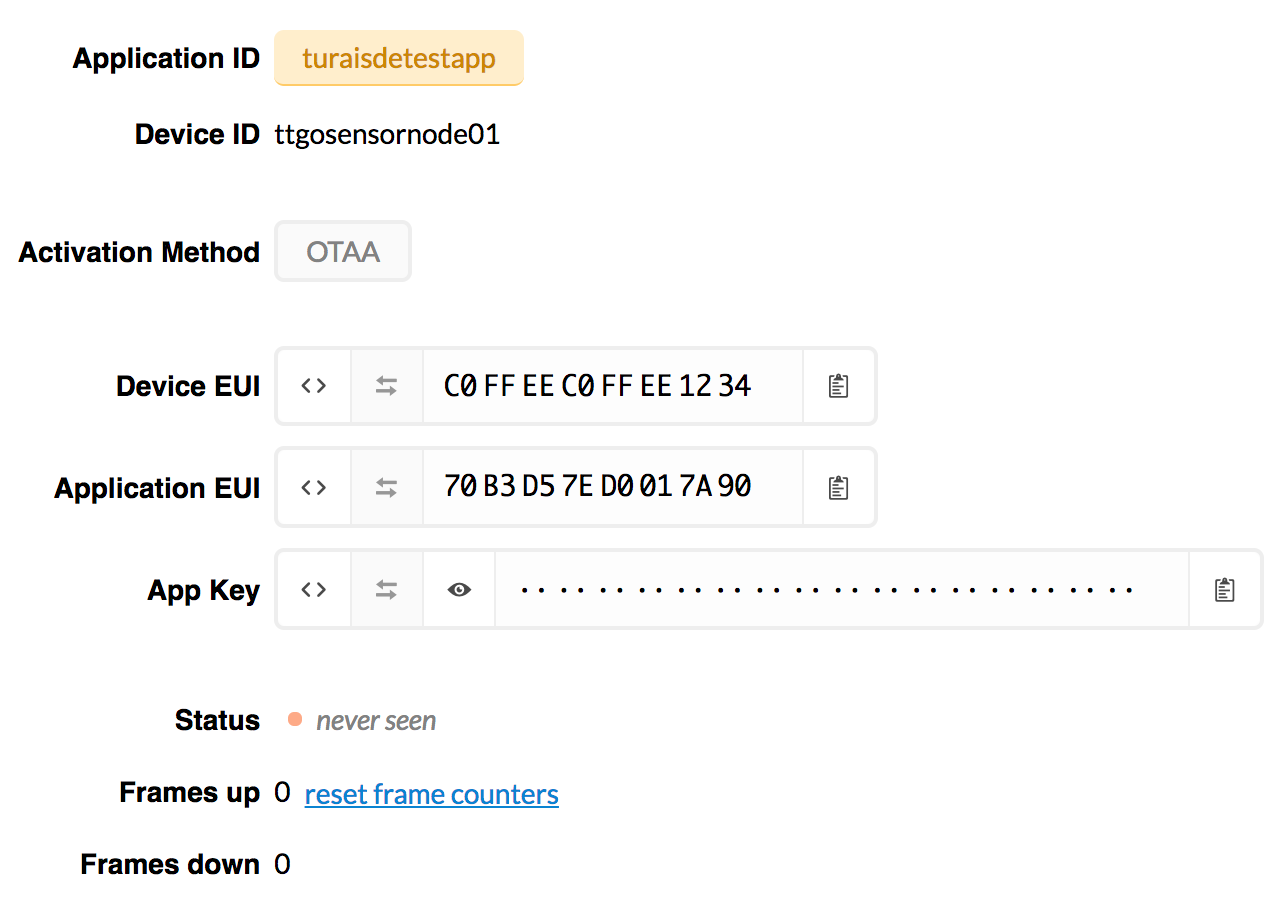
Code almost ready to copy and paste (you only need to change the EUIs and the APPKEY):
#include <Arduino.h>
#include "lmic.h"
#include "hal/hal.h"
#include <SPI.h>
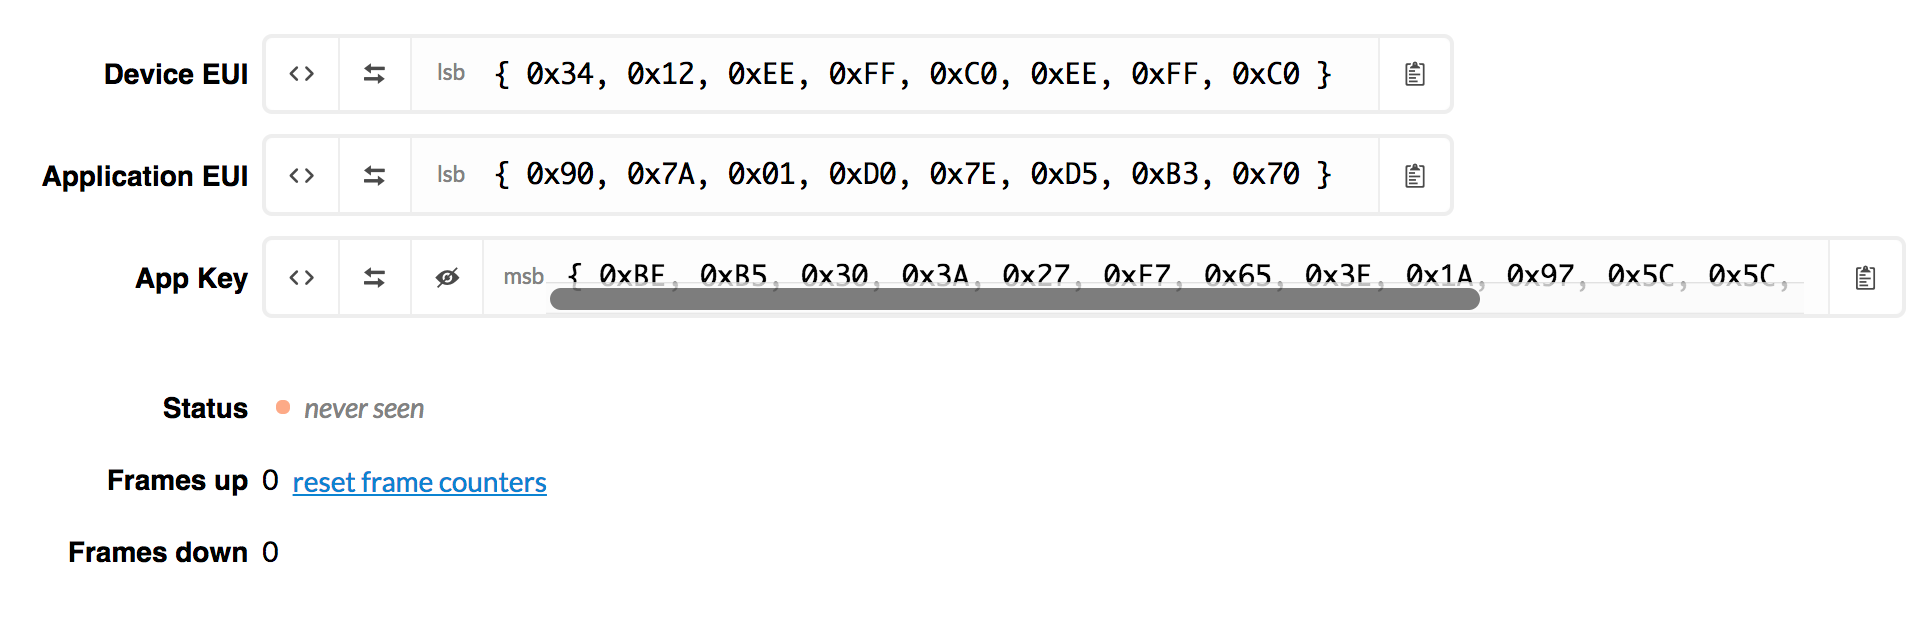
// This EUI must be in little-endian format, so least-significant-byte
// first. When copying an EUI from ttnctl output, this means to reverse
// the bytes. For TTN issued EUIs the last bytes should be 0xD5, 0xB3,
// 0x70.
static const u1_t PROGMEM APPEUI[8]= { 0xFA, 0x66, 0x01, 0xD0, 0x7E, 0xD5, 0xB3, 0x70 };
void os_getArtEui (u1_t* buf) { memcpy_P(buf, APPEUI, 8);}
// This should also be in little endian format, see above.
static const u1_t PROGMEM DEVEUI[8]= { 0xCB, 0xCE, 0xB0, 0x8C, 0xD6, 0x2C, 0xAB, 0x00 };
void os_getDevEui (u1_t* buf) { memcpy_P(buf, DEVEUI, 8);}
// This key should be in big endian format (or, since it is not really a
// number but a block of memory, endianness does not really apply). In
// practice, a key taken from ttnctl can be copied as-is.
// The key shown here is the semtech default key.
static const u1_t PROGMEM APPKEY[16] = { 0x16, 0x50, 0x53, 0xC5, 0xF4, 0x58, 0x94, 0xCF, 0xF2, 0x30, 0x81, 0x5F, 0x3D, 0xCF, 0x05, 0xAB };
void os_getDevKey (u1_t* buf) { memcpy_P(buf, APPKEY, 16);}
void do_send(osjob_t* j);
void onEvent (ev_t ev);
static uint8_t mydata[] = "HL";
static osjob_t sendjob;
const unsigned TX_INTERVAL = 60;
// Pin mapping
const lmic_pinmap lmic_pins = {
.nss = 10,
.rxtx = LMIC_UNUSED_PIN,
.rst = 9,
.dio = {2, 5, LMIC_UNUSED_PIN},
};
unsigned int lastMillis = 0;
void setup() {
Serial.begin(115200);
delay(2000);
Serial.println(F("Starting"));
// LMIC init
LMIC_setClockError(MAX_CLOCK_ERROR * 1 / 100);
os_init();
// Reset the MAC state. Session and pending data transfers will be discarded.
LMIC_reset();
do_send(&sendjob);
}
void loop() {
os_runloop_once();
}
void onEvent (ev_t ev) {
Serial.print(os_getTime());
Serial.print(": ");
switch(ev) {
case EV_SCAN_TIMEOUT:
Serial.println(F("EV_SCAN_TIMEOUT"));
break;
case EV_BEACON_FOUND:
Serial.println(F("EV_BEACON_FOUND"));
break;
case EV_BEACON_MISSED:
Serial.println(F("EV_BEACON_MISSED"));
break;
case EV_BEACON_TRACKED:
Serial.println(F("EV_BEACON_TRACKED"));
break;
case EV_JOINING:
Serial.println(F("EV_JOINING"));
break;
case EV_JOINED:
Serial.println(F("EV_JOINED"));
break;
case EV_RFU1:
Serial.println(F("EV_RFU1"));
break;
case EV_JOIN_FAILED:
Serial.println(F("EV_JOIN_FAILED"));
break;
case EV_REJOIN_FAILED:
Serial.println(F("EV_REJOIN_FAILED"));
break;
case EV_TXCOMPLETE:
Serial.println(F("EV_TXCOMPLETE (includes waiting for RX windows)"));
if (LMIC.txrxFlags & TXRX_ACK)
Serial.println(F("Received ack"));
if (LMIC.dataLen) {
Serial.println(F("Received "));
Serial.println(LMIC.dataLen);
Serial.println(F(" bytes of payload"));
}
// Schedule next transmission
os_setTimedCallback(&sendjob, os_getTime()+sec2osticks(TX_INTERVAL), do_send);
break;
case EV_LOST_TSYNC:
Serial.println(F("EV_LOST_TSYNC"));
break;
case EV_RESET:
Serial.println(F("EV_RESET"));
break;
case EV_RXCOMPLETE:
// data received in ping slot
Serial.println(F("EV_RXCOMPLETE"));
break;
case EV_LINK_DEAD:
Serial.println(F("EV_LINK_DEAD"));
break;
case EV_LINK_ALIVE:
Serial.println(F("EV_LINK_ALIVE"));
break;
default:
Serial.println(F("Unknown event"));
break;
}
}
void do_send(osjob_t* j){
// Check if there is not a current TX/RX job running
if (LMIC.opmode & OP_TXRXPEND) {
Serial.println(F("OP_TXRXPEND, not sending"));
} else {
// Prepare upstream data transmission at the next possible time.
LMIC_setTxData2(1, mydata, sizeof(mydata)-1, 0);
Serial.println(F("Packet queued"));
}
// Next TX is scheduled after TX_COMPLETE event.
}
- (Ad/Werbung:) Get your TTGO Lora Module at Aliexpress: Aliexpress.com (Affliate Link)
- CP2102 USB to UART: Aliexpress.com
This module is also known as:
- Pro mini_LORA 20180926 TTGO 868/915
- TTGO T-Deer Pro mini Mega328 LoRa 433 mhz/868 mhz/915 mhz für arduino
- TTGO T-Deer Pro mini
- T-Deer Atmega328
- ATmega328 Pro mini Lora Arduino
- TTGO T-Deer 868 mhz/915 mhz Modul
- TTGO LoRa SX1278 für Arduino
If you press this Button it will Load Disqus-Comments. More on Disqus Privacy: Link